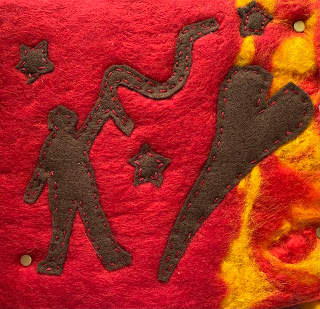
Posts

Showing posts with the label Upcycling

Learning to Sew - Pillow Talk

 Life for me is about staying alive, keeping active and learning new things. Latest thing to catch my attention is sewing.  Never really a sewer (or should it be “sewist”?) in my younger days, I find recently a strange draw to the sewing machine and fabrics.  Well, to be perfectly honest the fabric came first, became a bit of an obsession even, so once I had a fair stash I really needed to use it.  Enter the self learning of how to sew. I’m starting with simple things first, a pillowcase.  What can be more simple? Straight stitching.  Not a problem… I thought! My dolls are all laying around waiting for a new wardrobe of clothes, grumbling about their lot, but tackling a pattern is not yet on my agenda.  I’ve had to talk them into being patient. ;). First things first, straight things… simple makes that will be completed fast to keep my interest alive! Choosing the fabric for my new pillowcase is my first task.  Out comes the stash. Several hours later I find the perfect piece.   Also a
Image
I have been experimenting with the use of fabric hardener and have found it somewhat addictive. First I tried making a bowl.  Basically, you use an upturned plastic bowl as a former.   Cover the bowl with clingfilm to ensure nothing sticks to the bowl itself.   Use a plastic tray and pour a small amount of fabric hardener into it. Take your fabric and immerse in the fabric hardener. Gently rub the hardener into the fabric ensuring it is completely covered without being dripping wet. Place over the upturned bowl.  Make sure the bottom of the bowl is as smooth as possible to give stability and so that it won’t wobble when it’s done. The sides at this stage need to be as smooth as possible just so that the inside of the bowl will be fairly smooth.  Don’t worry over it too much. Take another square of fabric and coat it thoroughly in fabric hardener as before. Cover the first piece but this time allow the fabric to fall into natural folds (but remember to keep the base smooth). You can add

Upcycling / Recycling

Image
 Never quite sure if this is upcycling or recycling, but I have taken a child’s styling head toy and repurposed it as a Nature Goddess. First I took one old styling head that had seen better days - her hair was matted and frizzed.   After hair and makeup removal, I set about painting her green using acrylic paints.  I then decorated her with artificial flowers that I had left over from another project. Now I will paint the hessian fabric and her eyes (which will be closed as in meditation).  I’m toying with the idea of adding a little butterfly to her shoulder to finish her.  What do you think? Another item saved from landfill 😊 Best wishes Shari x

Making a bottle fairy house

Image
This was such fun to make and I changed things as I went along.  Using a glass bottle (this one is a gin bottle as I rather liked the blue glass) and some air drying clay, I left gaps for windows as I wanted to add lights inside.  An egg box was used to create one wall as it was my intention to make it look like stonework (kind of like crazy paving). Originally I intended to make the roof with strips of card stuck to the bottle stopper, but then I realised this would not be practical as I couldn’t easily open the bottle to add the lights or replace them if necessary (when the battery fails).  So I scrapped that idea and chose to make the roof slightly lower down. I used little strips of wood for the panelled door. Will get some updated pics of the progress shortly. Happy creating!  See you soon. Best wishes Shari 😊  

Mastering Mosaic

Image
 Hello everyone! Thought I would have a play with mosaics once again.  I’m self taught and have only made a few projects with mosaic, but it’s a very satisfying craft and quite easy to do. I have an old wooden cabinet in my bathroom that I wanted to brighten up and to mosaic seemed a really good option.  I cleaned up the top and proceeded to design the mosaic.  I wanted to keep with my nautical theme in the bathroom and designed a fish for the centre of my mosaic.   Before grouting Grouting done!   You can’t tell from this photo but I added a little pale blue acrylic paint to the grouting which really seems to harmonise the whole piece.  Just got to clean up and give it a rub up.  I’m very happy with the finished piece and it’s so much brighter and cleaner than just plain wood. I hope I’ve inspired you to have a go with mosaic. I’d love to see what you make, if you’d like to share.   It’s really satisfying and quite addictive! See you soon.  Happy making! Best wishes Shari 💕

Upcycling an old lamp

Image
 It has long been my desire to make a lampshade for a lamp that was gifted to me and I have at last accomplished this. With no real idea of how to go about it, I ordered some lampshade backing which is stiff kind of polythene stuff on which to mount your fabric. The fabric was an easy choice as I have mountains of the stuff from my sewing obsession period!  Having chosen a pretty blue-ish country pattern, I set about making templates of the wire sections to be covered. I used stiff card and simply pressed it against a section of the wire skeleton shade.  As there are two distinct sizes on my shade, I had to make two templates. Here are the two completed templates.  I used these to draw around to make both the fabric sections and also the backing mounts.  After drawing four of each template on to my backing mounts and four of each on to the fabric, I cut out the sections.  I think cut out the pieces. The polythene backing came with a sticky side so I was able to mount my fabric very eas